Frogman's
Custom Package Tutorial
Frogman's Custom Package Tutorial |
|||||
|
|
||||
|
HOW TO MAKE A CUSTOM
INSERT This tutorial is meant only as
a guide for creating custom inserts.
It will mainly demonstrate the proper measurements to use. It will not offer too much detail
on the techniques used in actually creating the insert. Each individual should use his/her
own creativity to make unique and truly custom works. THERE IS NO WRONG WAY TO DO
IT!!!! But I will show you a few of
my tricks to make it look authentic. Also, I will leave it up to
you to learn your software (whatever that might be) and the techniques
necessary for making these instructions work. I can't possibly give detailed
directions for every possible software package in use. But this should serve as an
adequate guide regardless of what software you
use. NOTE: All logos and such items are
subject to copyright and should be treated with
respect. STEP
1 Get the measurements of the
insert you are making and create the template for your work. You can
create the template manually or use (and adjust) the blank template
included with this tutorial.
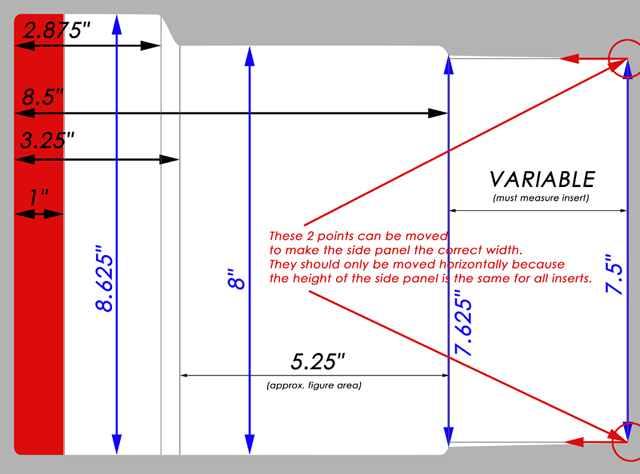
The
Measurements
Horizontal
8.5
inches: Outer left edge to
inside edge of fold
2.875 inches: Outer
left edge to top curve of angled tab
3.25 inches: Outer
left edge to bottom curve of angled tab
1 inch: Outer left
edge to outer edge of Sport Stripe
5.25 inches: Bottom
curve of angled tab to inside edge of fold (Approx. figure/clamshell
area) The side flap is different for
each figure depending on the size of the packaging. The width should be adjusted based
on the size of the insert you are creating.
Vertical
8.625 inches: Total
height of insert from top edge of angled tab to bottom edge of
insert
8 inches: Top edge of
figure area to bottom edge of insert
7.625 inches: Top of
inside fold edge to bottom of inside fold edge
7.5 inches: Top of
outside fold edge to bottom of outside fold edge The vertical measurements
remain constant. The only
variable is the width of the side flap. When adjusting this width, make
sure the outside fold edge remains at 7.5 inches. STEP
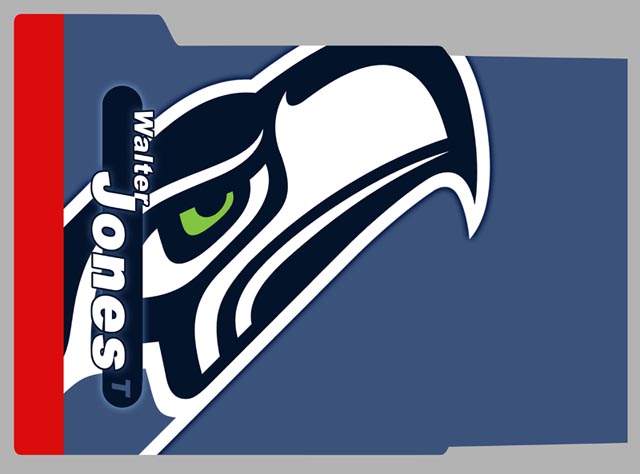
2 Start with the
background. Select a color or
picture you'd like to use and place it in the background of your
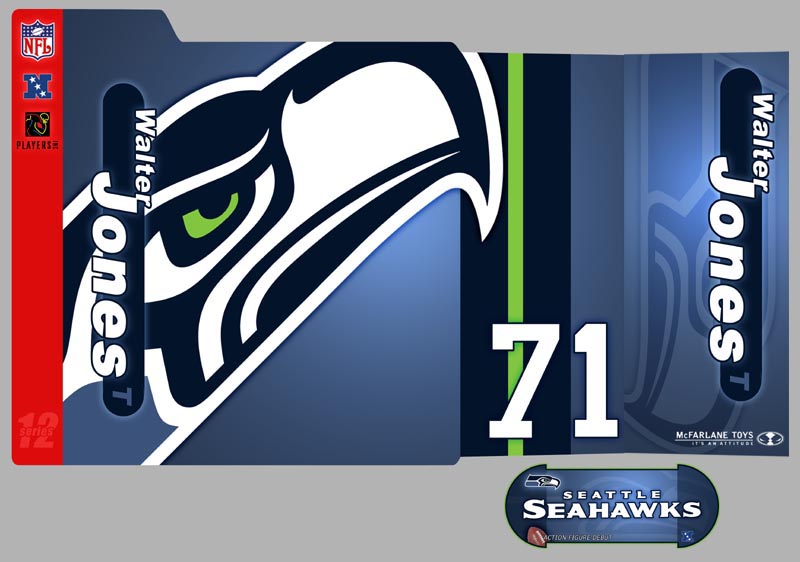
image. For this example, I
made a custom Seahawks insert, so I used blue as my background
color.
STEP
3 Now drop in a logo or some
text to indicate which team or player you are using. I added the Seahawks logo.
STEP
4
STEP
5
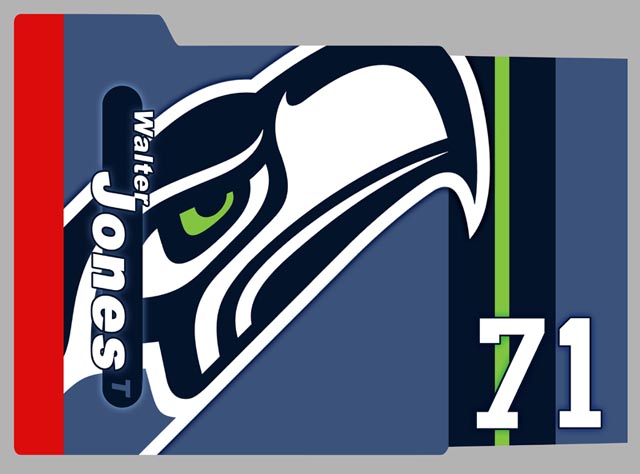
STEP
6 Add any details and effects as
you wish. I added some colors
and stripes to the inner side flap as well as the number 71. I also added some effects to the
text and logos.
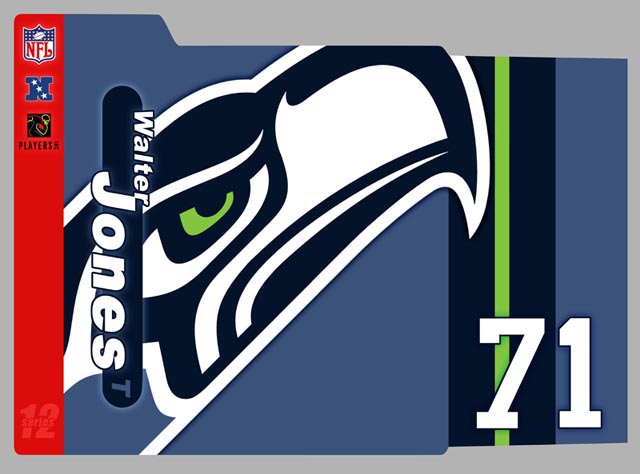
STEP
7 Finishing touches. If you're going for an authentic
look, add the appropriate logos and text that you would see on a real
insert. I added some logos as
well as the series number.
ADDITIONAL
TIPS Creating the back and outer
side flap is done exactly the same way. The only thing you will need to do
is flip the template horizontally.
All the measurements are the same.....just
reversed. Creating the sticker is very
much the same as the insert.
There's only one rule for creating the sticker. It should be no wider than 4.625
inches. Otherwise, it won't
fit on the front of the clamshell. Printing can be a bit
tricky. You should be able to
get the front insert and inner side flap plus the outer side flap on one
sheet of 11 x 17 paper. If
you are printing the back insert as well, you might want to print the
front and inner side flap on one sheet and the back and outer side flap on
another sheet and then piece them together. Cut the insert down to size, place
it in the bubble, and you're done!!! FROGNOTES I did this tutorial because
several people had asked for my help in creating custom inserts. I was happy to do it. However, I am an artist, and I
take my work pretty seriously.
I strive to be original and creative, and I try very hard not to
copy someone else's work. I
would appreciate it if you did the same. Use this tutorial as a teaching
guide....not as a means to replicate my work. Besides, it is much more rewarding
to come up with your own designs and personal
touches. I hope this has helped, and I
look forward to seeing what everyone comes up with.
|
||||
|
|
||||